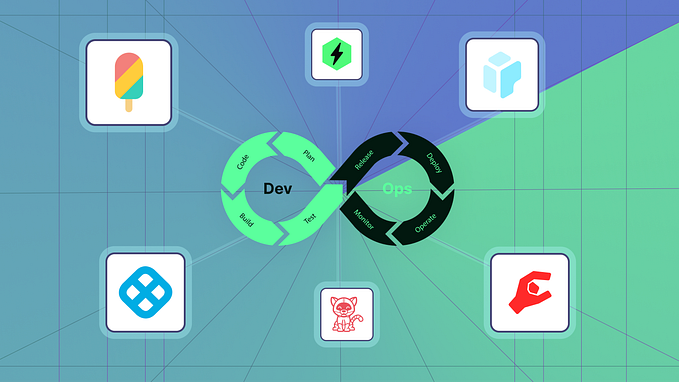
From Code to Cloud: A Deep Dive into CI/CD Pipelines
In the fast-paced world of software development, getting our code from “it works on my machine” to “it’s live in production” can feel like a marathon. But how do you make sure that journey is smooth, fast, and free of those bugs that love to sneak in at the last minute? That’s where CI/CD comes in — Continuous Integration and Continuous Deployment, also known as the spicy sauce of modern software development.
At Sharesquare, our core platform comes with two frontend repositories — one built with an older version of Nuxt.js and another using the latest version — both of which rely on a robust backend powered by the Laravel framework. Each of these repositories is supported by its own dedicated GitHub workflow, ensuring a streamlined and efficient CI/CD process. To top it off, we leverage Azure for deployment, providing us with the cloud infrastructure needed to deliver reliable and scalable applications to our users. In this blog, we’ll explore the in’s & out’s of our CI/CD pipelines.

What is CI/CD?
At its core, CI/CD is a methodology that streamlines the development process by automating the integration of code changes and their deployment to production environments. Here’s a quick breakdown:
- Continuous Integration (CI): Automatically merges code changes into a shared repository, running tests to ensure everything works together.
- Continuous Deployment (CD): Automates the deployment of code to production once it passes all tests, ensuring that updates are delivered quickly and reliably.
Setting Up a CI/CD Pipeline with GitHub Actions and Azure
Now, let’s take a closer look at how we handle deployment for the ShareSquare backend. Our backend, built on the Laravel framework, has its own dedicated GitHub workflow. The core of deployment process lies in the deploy.yaml file. Once the code is merged into the main branch, GitHub Actions kicks in, performing all necessary checks before deploying the code to Azure. Azure then takes over, ensuring our backend is deployed with the scalability and reliability needed to support our application in production.

1. Workflow Triggers
The workflow is designed to run whenever there’s a push to the main branch or when manually triggered through the GitHub Actions interface. Ensures that changes pushed to this branch automatically start the deployment process.
name: Your Project Name
on:
  push:
    branches:
      - main
  workflow_dispatch:
    inputs:
      target_branch:
        type: string
        description: Provide branch or commit hash
        required: false
        default: main
2. Concurrency
concurrency: ${{ github.ref }}-${{ github.event.inputs.staging }}-${{ github.event.inputs.target_branch }}The concurrenct setting in our workflow configuration ensures orderly and controlled execution of our workflows. It prevents simultaneous runs that could lead to conflicts or redundant processing, enhancing the efficiency and reliability of our CI/CD pipeline.
The idea is to allow for multiple, concurrent deployments only if they all target distinct environments.
3. Environment Variables
Also Sets environment variables for the workflow. Kept sensitive information like secrets secure and centralizes configuration.
env:
  COVERAGE_TARGET: ${{ secrets.COVERAGE_TARGET }}
  TEST_DOT_ENV: ${{ secrets.DOT_ENV_TESTING }}
  # Other environment variables...
4. Jobs Overview
The workflow contains several jobs, each responsible for different tasks. Here’s a breakdown:
4.1 PHP-DEPLOY Job
The PHP-DEPLOY job is designed to handle the deployment of our PHP-8 application. This job runs on an ubuntu-22.04 runner within a Docker container, which ensures a consistent and isolated environment for our build process.
PHP-DEPLOY:
    name: Build PHP-8
    runs-on: ubuntu-22.04
    container:
      image: docker.pkg.github.com/your-docker-repo/php8-fpm-base
      credentials:
        username: ${{ secrets.YOUR_IMAGE_USERNAME }}
        password: ${{ secrets.YOU_IMAGE_PASSWORD }}
4.2 Checkout Code
Pulls the code from the specified branch and ensures the latest code is used for deployment.
- uses: actions/checkout@master
  with:
    fetch-depth: 0
    ref: ${{ github.event.inputs.target_branch }}
4.3 Run Snyk for Vulnerabilities
In this step, we leverage Snyk to enhance our security posture by scanning our code for potential vulnerabilities. This step is conditionally executed based on two criteria: the event must be a push or a workflow_dispatch, and it must be targeting the main branch.It wont run Snyk if target branch is other then main.
The snyk-testcommand is then executed with several options:
--all-projectsensures that all relevant projects are scanned.--severity-threshold=highfilters the results to show only high-severity issues, focusing on the most critical vulnerabilities.--policy-path=.snykspecifies the path to our Snyk policy file, guiding the scan according to our defined rules.--json-file-output=snyk-test.jsonoutputs the results in JSON format for easy parsing and further analysis.
- name: Run Snyk to check for vulnerabilities
  if: ${{ (github.event_name == 'push' || github.event_name == 'workflow_dispatch') && github.ref == 'refs/heads/main' }}
  run: |
    snyk config set api=${{ secretS.YOUR_SNYK_TOKEN }}
    snyk test --all-projects --severity-threshold=high --policy-path=.snyk --json-file-output=snyk-test.json
  shell: bash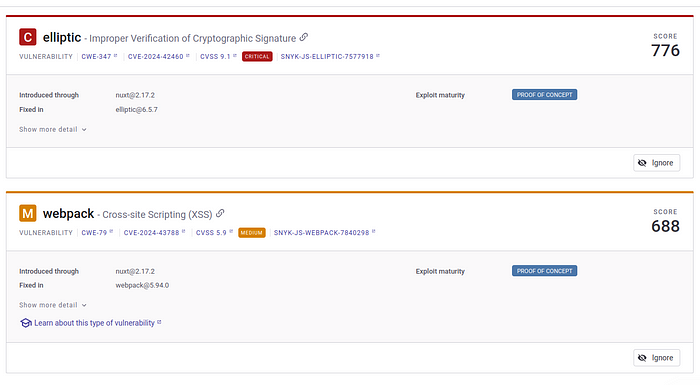
Snyk’s CLI tool allows developers to run security scans directly from their local development environment.
Install the Snyk CLI, authenticate it, then run snyk test to find vulnerabilities and snyk fix to apply fixes. Integrate Snyk into your workflow to stay secure.
Promoting quality through enforcement
Like a few other steps we have, for example the code coverage check, the idea is to fail the rollout if the security check doesn’t pass: if that happens, the committer or release meister will have to fix it.
In this way, there’s no hiding for the team, and any failed check clogs the pipeline, increasing the urgency to fix it in a natural way — with the final result of keeping the quality standards high.
Attach it to the release, or it will die off!

4.4 MySQL Setup
In this step, we’re setting up a test database environment to ensure it’s ready for our workflow unit tests and code coverage. This includes initializing MySQL, creating the necessary database, and configuring socket files for proper interaction. By doing so, we make sure our database is correctly configured and available for any tests or deployment tasks that rely on it, helping to avoid issues later in the CI/CD pipeline.
- name: MySQL setup
  env:
    DB_PASSWORD: db_password
  run: |
    mysql_install_db
    mysqld_safe --skip-grant-tables --skip-networking &
    sleep 10
    mysql -u ${{DB_USER}} -e 'CREATE DATABASE `${{DATABASE}}`;'
    ln -s /run/mysqld/mysqld.sock /tmp/mysql.sock
    mkdir /var/mysql; ln -s /run/mysqld/mysqld.sock /var/mysql/mysql.sock
  shell: bash
4.5 Run Test Actions
Running tests at this stage is crucial for validating the integrity of the code and ensuring that new changes do not introduce regressions or break existing functionality. It’s a key part of maintaining code quality and reliability throughout the CI/CD process.
- name: Run Test Action
 env:
   DOT_ENV_TESTING: ${{TESTING_eNV }}
 uses: ./.github/actions/runtest
The workflow action ./.github/actions/runtest is used to execute a set of predefined testing steps. This custom action encapsulates the detailed testing process, making the main workflow file cleaner and easier to manage.
Let’s have a look at the most important steps in it.
4.5.1 Composer Install
Installs PHP dependencies for the project.It Ensures that all necessary libraries and packages are available for running tests.
runs:
  using: composite
  steps:
    - name: (CI) Composer install
      run: |
        composer config -g http-basic.nova.laravel.com "${{ env.NOVA_USER }}" "${{ env.NOVA_PASSWORD }}"
        COMPOSER_MEMORY_LIMIT=-1
        composer install
      shell: bash
Composite? A composite action is a type of action that lets you bundle multiple steps into a single action definition.
In this GitHub Actions workflow, theNOVA_USERandNOVA_PASSWORDenvironment variables are used to configure Composer with authentication details for a private repository (in this case that of Laravel Nova to fetch this dependency).
4.5.2 Migrate Database:
Applies database migrations to set up the testing database schema and the database is in the correct state before running tests.
- name: Migrate Database
  run: |
    cp test.env .env
    php artisan migrate --no-interaction --force
4.5.3 Run Test and Check Coverage
Executes the PHPUnit tests and generates a coverage report. Verifies that the code functions correctly and measures test coverage. Compares the test coverage against a target threshold.
- name: Run tests
  run: |
    XDEBUG_MODE=coverage ./vendor/bin/phpunit --exclude-group ignore --coverage-xml target/coverage
- name: (CI) Check coverage
  run: php phpunit-threshold.php target/coverage/index.xml ${{ env.COVERAGE_TARGET }}
Like with Snyk, a failure in the tests or coverage will fail the pipeline. Temporarily lowering the COVERAGE_TARGET should be a call of the team lead only, and exclusively to allow hotfixes to be rolled out in the unfortunate case where the coverage doesn’t hit the threshold.
4.5.4 Larastan Static Analysis
Runs static analysis on the codebase using a Laravel-specific PHPStan to catch potential issues. Provides additional code quality checks beyond unit tests, ensuring robust and maintainable code.
- name: Larastan Static Analysis
      run: |
        cat << EOF > .env
        APP_KEY=$(php artisan key:generate --show)
        JWT_SECRET=$(php artisan jwt:secret --show)
        EOF
        ./vendor/bin/phpstan analyse --memory-limit=1G
        rm .env
Each of these steps in the runtest file is crucial for ensuring that the application is well-tested, secure, and ready for deployment. By automating these processes, we maintain high code quality and catch issues early in the development cycle.
4.6 Azure CLI Authentication
In this GitHub Actions step, we are authenticating and setting up the Azure CLI to interact with our Azure environment. We start with a login process to connect with Azure CLI.
name: Auth Azure CLI (int)
run: |
  az login --service-principal -u ${{ env.AZURE_SP_APP_ID_INT }} -p ${{ env.AZURE_SP_SECRET_INT }} --tenant ${{ env.AZURE_TENANT_ID }}
  az account set --subscription ${{ env.AZURE_SUB_ID }}
This step is essential for allowing our GitHub Actions to interact with Azure resources securely without needing user credentials.
By specifying the subscription, you make sure that our deployment or resource management tasks are performed in the right Azure environment.
The authentication is based on an Azure Service Principal (Azure Active Directory / Microsoft Entra application registration). The AP should have Website contributor access on the whole AppService Instance (not just the target slot because we perform a slot swap).
4.7 Whitelist Runner on SCM Site Azure Staging
- name: Whitelist runner on SCM site Azure Staging
  if: ${{((github.event_name == 'push' || github.event_name == 'workflow_dispatch') && github.ref == 'refs/heads/main') }}
  run: |
    runner_ip=$(curl https://api.ipify.org)
    if ! (az webapp config access-restriction show -g ${{ env.AZURE_WEBAPP_RESOURCE_GROUP_INT }} -n ${{ env.AZURE_WEBAPP_APP_NAME_INT }} | grep $runner_ip); then
      az webapp config access-restriction set -g ${{ env.AZURE_WEBAPP_RESOURCE_GROUP_INT }} -n ${{ env.AZURE_WEBAPP_APP_NAME_INT }} --use-same-restrictions-for-scm-site false
      az webapp config access-restriction add -g ${{ env.AZURE_WEBAPP_RESOURCE_GROUP_INT }} -n ${{ env.AZURE_WEBAPP_APP_NAME_INT }} --rule-name "Github hosted runner whitelist" --action Allow --ip-address $runner_ip --priority 300 --scm-site true --description "Added by Github actions"
    fi
    sleep 120
What it does is:
- it fetches the public IP address of the GitHub Actions runner that’s currently executing the workflow
- it checks if the runner’s IP is already whitelisted, if not
- it updates the access restrictions to allow this IP address
Basically what it manges that the GitHub Actions runner can connect to and deploy to our Azure Web App without hitting access restrictions. More specifically, the Networking configuration of the AppService should have to separate whitelists for the actual site and administration/SCM site (Kudu portal), and here we are temporarily whitelisting the runner on the latter.
5.0 Deploy to Azure Staging
- name: Deploy to Azure production staging slot
  if: ${{ (github.event_name == 'push' || github.event_name == 'workflow_dispatch') && github.ref == 'refs/heads/main' }}
  env:
    APP_ENV: ${{ env.PRODUCTION_STAGING_SLOT_ENV }}
    APP_NAME: ${{ env.AZURE_WEBAPP_APP_NAME_PRODUCTION }}
    SLOT_NAME: staging
    APP_PUBLISH_PROFILE: ${{ env.PUBLISH_PROFILE_PRODUCTION }}
  uses: ./.github/actions/deploy-azure
This step is key in ensuring that our application is tested in a staging environment before being pushed to production, which helps catching issues early and ensuring a smooth deployment process. It further depends on a seperate file deploy-azure , lets break down it too:
runs:
  using: composite
  steps:
    - name: Deploy to Azure
      if: ${{ env.SLOT_NAME != null }}
      uses: azure/webapps-deploy@v2
      with:
        app-name: ${{ env.APP_NAME }}
        publish-profile: ${{ env.APP_PUBLISH_PROFILE }}
        package: "."
slot-name: ${{ env.SLOT_NAME }}- Azure Deployment Action: The
azure/webapps-deploy@v2action is used to deploy the application to Azure.
Deployment Parameters:
app-nameThe name of the Azure App Service where the application will be deployed. This is specified through the variable.publish-profileThis is the authentication method used for deploying the app. The publish profile contains credentials for securely connecting to Azure and is passed through the variable.packageThis is the path to the application code or artifacts that are being deployed. Here,"."indicates that the current directory (containing the app files) is the package being deployed.slot-nameThis specifies the deployment slot to which the app will be deployed, defined by the variable.
5.1 Slack Notification Setup
It Sends a notification to Slack if the deployment fails. Provides real-time alerts for failures to take immediate action.
- name: Notify Slack of failure
  if: always()
  uses: ravsamhq/notify-slack-action@v2
  with:
    status: ${{job.status}}
    notify_when: "failure"
    notification_title: "Build Failure"
    message_format: ":astonished: *Failure on {workflow}:{job}"
  env:
    SLACK_WEBHOOK_URL: ${{ secrets.MASTER_FAIL_SLACK }}
5.2 Test-Staging Job
if: ${{ (github.event_name == 'push' || github.event_name == 'workflow_dispatch') && github.ref == 'refs/heads/main }}
    needs: [PHP-DEPLOY]
    runs-on: ubuntu-latest
    steps:
      - name: Code deployment sanity check
        run: |
           sleep 10
           curl -o - -I 'https://app-open-source-endpoint/api/strings?lang=en' | grep 'HTTP/2 200'
Runs after the PHP-DEPLOY job and performs sanity checks. Verifies that the deployment was successful before proceeding.
Here we just ping and check if the deployed application responds correctly. While this is enough to prevent embarassingly failures, like swapping in a code version where the app won’t even start, it is a very thin guarantee.
Additional automated checks we perform are not included in this blog story — next time maybe!
5.3 Swap-Staging-To-Production
In this step of our CI/CD pipeline, we’re performing a critical operation, swapping the staging slot with the production slot on our Azure App Service. This means that once our staging environment has been thoroughly tested and we’re confident everything works as expected, we make it live by swapping it with the production environment.
- name: Swap staging to production
  env:
    RESOURCE_GROUP: ssq-production-1
    APP_NAME: ${{ env.AZURE_WEBAPP_APP_NAME_PRODUCTION }}
  run: |
    az webapp deployment slot swap -g ${{ env.RESOURCE_GROUP }} -n ${{ env.APP_NAME }} --slot staging --target-slot production
Deploying a Nuxt Frontend with CI/CD
In this section, we’ll dive into the CI/CD pipeline specifically tailored for our Nuxt frontend applications. This pipeline ensures that every push to the master branch or manual trigger initiates a seamless build and deployment process to Azure Static Web Apps.
Workflow Overview
Our CI/CD pipeline for the Nuxt frontend is designed to handle multiple stages and environments efficiently. Here’s a breakdown of how the workflow operates:
Trigger and Checkout:
The pipeline is triggered on push events to the main branch or via manual dispatch. It checks out the latest code from the specified branch or commit hash.
name: My-Nuxt-App
on:
  push:
    branches:
        - main
  workflow_dispatch:
    inputs:
      target_branch:
        type: string
        description: Provide branch or commit hash
        required: false
        default: main
Jobs Overview
By leveraging GitHub Actions, Node.js, and Azure Static Web Apps, the pipeline manages dependencies, performs security checks, and handles deployments efficiently.
Node Version
In our project, we manage two distinct Nuxt versions, each utilizing a different Node.js version to ensure compatibility and stability:
- New Nuxt Version: We have upgraded to Node.js version 18. This version provides the latest features and improvements, enhancing performance and security for our updated application.
- Old Nuxt Version: For the legacy Nuxt application, we continue to use Node.js version 16. This ensures consistent functionality and support for the older codebase while maintaining compatibility with existing dependencies.
uses: actions/setup-node@v3
with:
  node-version: 18
Yarn install
Installs the project dependencies, potentially regenerating the yarn.lock file if needed.
name: Yarn install
run: |
  source ci.conf
  if [ $USE_LOCK == 0 ]; then rm -f yarn.lock; fi
  export NODE_OPTIONS=--max_old_space_size=1000
  yarn install
Snyk Vulnerability Scan
Snyk is utilized to scan for vulnerabilities in dependencies. This helps identify and address potential security issues before deployment, like we did before.
Yarn Test
run: yarn testThis step runs Jest tests to validate the codebase, ensuring that new changes don’t introduce any regressions or bugs. Jest, a widely-used testing framework for JavaScript, provides comprehensive testing capabilities, including unit and integration tests.

yarn test? Because the tests were failing, and they wanted to reach new heights of success. Photo By Ferenc Almasi on UnsplashInitializes Environment Configuration from GitHub
- name: Initializes environment configuration from Github
  run: echo "${{ vars.FRONTEND_ENV }}" > .env;
This step sets up the environment configuration for the application by writing the environment variables to a .env file. The variable contains the necessary environment settings, ensuring that the application runs with the correct configurations specific to the deployment environment.
Deploy to Production
- name: Deploy to production
  uses: Azure/static-web-apps-deploy@v1
  with:
    azure_static_web_apps_api_token: ${{ env.DEPLOYMENT_TOKEN_PRODUCTION }}
    action: "upload"
    app_location: "/"
    output_location: "dist"
    app_build_command: "yarn generate"
By performing these steps, the CI/CD pipeline ensures that our production environment is updated with the latest changes from the main branch, while also maintaining the correct environment settings.

Slack Notification
Nothing new, see backend part!
Conclusion: The Road to Reliable Deployments
Navigating the complexities of modern software development requires more than just writing code, it demands an efficient and reliable process to get that code into production. CI/CD — Continuous Integration and Continuous Deployment — has become the backbone of this process, ensuring that our code moves from development to deployment with speed and accuracy.
Happy coding and deploying!
Blog by Riccardo Vincelli and Usama Liaquat brought to you by the engineering team at Sharesquare.


